Showing posts with label TIE fighter. Show all posts

Monday, March 6, 2017

Hobby desk update

Hi to the tough hobby guys, (and the fabulous hobby girls of course!)

No long article today, just something I've been working on recently...
My last review was about the 1:144 scale First Order TIE fighters. I pretty much finished them up by now and I'm about to crash one into the desert of Jakku...


Another Star Wars project I was working on is my crashed Imperial Star Destroyer, also one of the Bandai Star Wars vehicle kits I reviewed. This project is almost done now!


Lastly, I got this new addition to my pile of shame. Another project I really want to do but is in line with a ton of other cool kits, busts, and models... It's a Shaetann bust by mproyec, a limited edition figure that looks absolutely amazing and I just had to have!


That's all for now, people! I still have a review planned for the Bandai mini millennium falcon and if you guys want I will keep you more up to date on projects that I'm working on!

Cya all next time!

Monday, February 6, 2017

Bandai Star Wars Vehicle Model First Order TIE-Fighter set review

Hello my friends!

If you follow me personally on facebook you might know that I received two extra Bandai Kits. Today I will unbox and review the First Order TIE-Fighter set and I will do the Millenium Falcon (hopefully) next week. 

A couple of weeks ago I took a look at the Imperial Star Destroyer in this range of models. The diorama I'm working on is almost complete! 

Back to the TIE's! 

This kit features both the TIE/fo and the TIE/sf space superiority fighters. The First Order TIE's have a similar design to the old Galactic Empire TIE/ln fighters but are basically upgraded versions. The TIE/fo has deflector shields and improved solar cells while the TIE/sf is outfitted with a hyperdrive and has place for a pilot and a gunner to operate the ventral turret. The TIE/sf is reserved for the First Order's most elite pilots.


Enough with the background information. It's a Bandai kit so officially it's only sold in Japan. Thanks to Ebay I was able to buy this kit for $4.60 which for what you get is a steal! It's Bandai so details are great and the kit is easy to put together. This is kit number 004.

The box states this kit is suited for kids from 3y/o and up but I'm a bit skeptical about that. I don't have kids but I think it's more for like 8y/o and up due to the small pieces and the skill required to cut it from the sprue and put the model together. 

That doesn't take away from the fact that this is a very accessible kit in both price and required skill for younger people whether they are interested in model building or if they just want some cool Star Wars toys. 

Now let's open up this box!
Just like the Star Destroyer, the instructions on how to put the models together are printed on the inside of the box. Most probably to reduce costs. It has a nice, old-school vibe to it. Unlike most Bandai kits, some of the instructions are written in English, although the instructions are simple enough to just figure it out.


This kit comes with a little sticker sheet. I'm kind of disappointed that they didn't add decals as well, as I really don't like using stickers. I won't be using these anyway as I will be painting the model but I do want to share my opinion about it. 


Comparable to the Star Destroyer kit, we find five sprues numbered A1 through A4 and BM1. A4 holds a wing, TIE/fo front half, a cockpit window and two bottom plates. fist thing I noticed is that the wings are completely black. The TIE/fo is supposed to have white solar cells and there are no stickers for this. Again, I'm going to paint it anyway so it's no problem for me but I was expecting more from a Bandai kit. 


On sprue A3 we find another wing, the rear half of a TIE/fo cockpit, a bottom hatch and a piece of the stand. 


Sprue A1 holds a TIE/sf wing, the TIE/sf front half of the cockpit, a cockpit window and a bottom hatch. It also contains the TIE/sf heavy laser turret.


Sprue A2 holds the last TIE wing, again for the TIE/sf, the back of the TIE/sf cockpit, a bottom hatch and two parts of the hull that are supposed to be colored red.


The same as with the Imperial Star Destroyer, the sprue labeled BM1 hold the parts for the stand.


The model is easy to cut out of the sprue and easy to put together. Keep in mind that the wings have little pegs where they connect to the TIE and they will only go on one specific way.


For ease of painting the solar cells, I didn't glue on the wings yet.


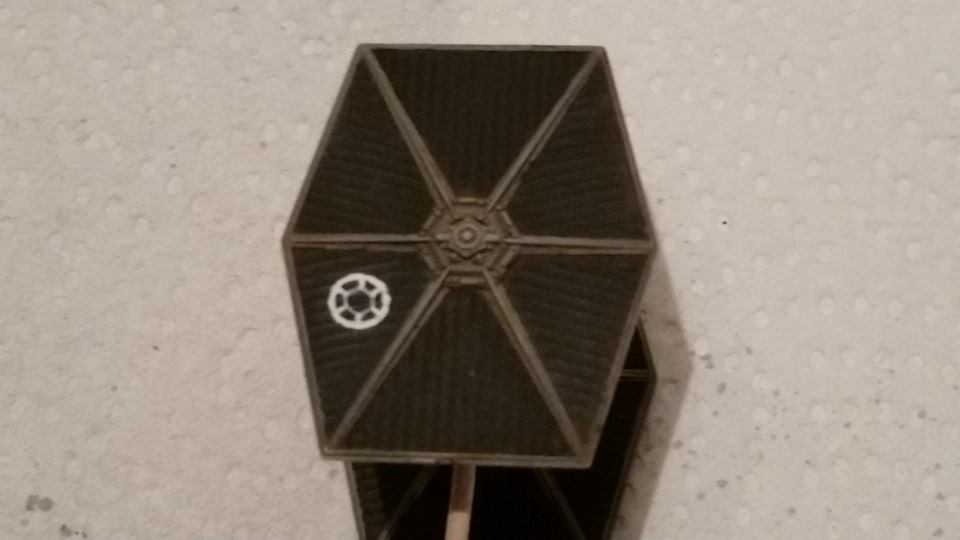
Just a quick and dirty paintjob. I painted the whole model in black, painted a gloss varnish over the cockpit window and painted the struts in a medium gray. If you are hand painting it, don't forget that the TIE/fo also has two small windows on the top hatch and the TIE/sf also has a back window for the rear gunner. 

Below you can see the TIE/sf mostly assembled. I left the cockpit window out because I still had to paint the parts of the hull that are supposed to be red and if you put in the cockpit window before installing these hull parts, you can't put them in later!!! I make these mistakes so you don't have to.


That concludes today's article. Eventually I will turn the TIE/sf into another crash site from Star Wars: the Force Awakens. More on this later or on my personal facebook. 

I hope you enjoyed reading it!

Untill next time!

Wednesday, August 20, 2014

How to paint a miniature Star Wars Imperial logo and blood stripes on a TIE-Fighter

Hey guys and girls!
As promised I got a little tutorial on how I painted the small imperial logo on my TIE-Fighter. I found an example painted by a guy called Rodent Mastermind but no explanation how to paint it. I had to exeriment a couple of times to get it right.

 What I like about this is that it gives your X-Wing models a little extra character, like it could be a squadron leader or a decorated veteran. It's small enough to be a little forgiving on the details but it is detailed enough so it's recognizable from a tabletop distance.

You will need only one color of paint. This could be white, off-white or a very light grey. Whatever you like the most or what fits your paint scheme.

I began with the outer circle. This will mark the full location and size. I used the plastic rod to protect your brushes to "stamp" the location and used a brush to get a nice and even outer ring.

Outer ring stamped and corrected

When your satisfied with the outer ring, paint two small lines. One at the top and one at the bottom. Make sure these are pointing towards the top and bottom of your ship. After that, while trying to keep the Space between them as even as possible, add four more lines, bringing the total to six.

Divided the circle with small lines

Connect the lines inside the ring by painting a hexagon.

It's like connect the dots

At the corners of the hexagon, paint a square where the corner of the hexagon meets the line connecting it to the outer circle. I filled in the rest of the hexagon except for a small black dot in the middle.

Already starting to look like we are getting there! 

Now draw small black lines from the black dot. You can make these lines a bit triangular shaped if you like, but at this scale lines look good enough in my opinion.

Imperial logo is done! 

So on with the blood stripes. This is a visual introduced with the imperial aces. If I understood correctly imperial pilots are allowed to display these if they get ten kills. This means it is a nice way to decorate named pilots or veteran squadron leaders.

I started by masking the location of where I want to paint the stripes. Then, continuering with the weathered look, I choose to sponge on the paint.

Tamiya Masking tape applied

For this, I tore of a piece of blister sponge, dipped it into my red paint, rubbed off the excess paint on a paper towel and applied it to the miniature. The masking prevents the paint from hitting spots I don't want to to get on.

Blister sponge

I mixed up a semi-dark red for the blood stripe

Remove the masking tape and apply a thin layer of black wash.

Final, finished result

Your done now! You could touch some spots up with black, white or red but that's basically how you paint the logo and the blood stripes. Now if you weathered your ship a little (I did!) you can use some black and orangey - brown washes or pigments to give the logo and the stripe the same treatment.
I really hope you guys enjoyed this little tutorial! I sure did have a lot of fun experimenting and writing it!
Thank you for reading and see you next time.