Showing posts with label airbrush & analog. Show all posts

Thursday, May 3, 2018

How to quickly paint faces

Hi guys (and girls)

It's been way too long since I've posted anything. Reasons for this are family stuff, work stress, changing jobs etc... I just really hope I can post more frequently from now on.

In this article, I would like to cover a trick I recently learned/discovered for painting faces.

It has to do with subdermal colors in the skin. I'll show the pictures first, and explain the reason why later on.

I began by pre-shading the head with black and white paint. This will give you a good indication of where your shadows and highlights should be. If you paint transparently enough, the shadows and highlights will shine through your paint job, but even if you paint more opaque, making a picture of this step will be a good reference!


I loaded my airbrush up with some red paint and sprayed the top half of the face. Make sure to cover the cheekbones, nostrils and the tip of the nose. 


After that, I got the blue paint ready. I used this to spray the bottom half of the face. I also sprayed a little blue over the red in the eye sockets, creating a dark purple. 


With the red and blue colors in place, I continued to paint the face as I usually would. I used the Scale75 skin colors for this. 


You can see that the cheeks and the nose bleed through some of the red color and that the chin has a light blue tone. This gives the illusion of rosy cheeks a five'o'clock shadow. After the skin tones, paint the lips with a red-ish/pink-ish color and paint a little bit of texture on the lower lip. Also highlight the eyelids, nose, upper lip and any wrinkles if they are present on the model, and the face is pretty much done!


Now onto the reasons why...
The central part of a face has fine blood vessels carrying oxidized (red) blood to the surface of the skin. The chin, especially on a black-bearded man, appears blueish due to microscopic hairs. Women and children don't have a five'o'clock shadow but in the area around the lips are relatively more veins carrying deoxidized blood to the surface. Some artists paint this as a green color to compliment the color of the lips. 

Traditionally, there is also a yellow or white zone of the face. This is the forehead that doesn't have as many muscles and blood vessels and thus doesn't have as many red blood cells. 

I hope you liked this little tutorial and that it helps you. If you have any questions feel free to post them in the comment section below.

Thank you for reading and until next time! Peace ✌

Monday, August 28, 2017

Kahl-Agul - a vampire bust by Karol Rudyk Art

Hi, fellow hobbyists!

Today I will show you the latest addition to my pile of shame. I was very excited about this bust because it has a unique look and shape!

Karol Rudyk Art is a company from Poland, founded by Karol Rudyk who himself is a sculptor and award winning painter. Browsing his website, you will currently find dragons and vampires of the highest quality. He has two very large dragon models, both with a rider and a large scenic base. He also has some vampire busts for sale.

And I got my hands on one of them...


Kahl-Agul is a heavily deformed vampire, more bat than man. There is no back story for him so that is totally up to you. He could be transforming into or from his bat form, or he could be a feral vampire, feeding on himself and rodents (bats and rats), mutating him to this state.

Side view of this resin bust, take note of the hunched over
pose of the vampire.

This resin bust, sculpted by Luke Starkie, has a really scary feel and looks like it stepped straight out of a horror movie. For a bust, it has a bit of a strange pose, leaning forward and his arms/wings slightly forward and outward. The bottom is also completely flat, so you can't just stick it to a standard bust plinth cut on an angle. This means it needs a slightly more creative solution and this can be hard for some people, and me. 😜

The flat bottom of this bust makes it hard to for to think of a
suitable plinth. But maybe an oval shape can work!

This bust is about 6,5cm high...

... but almost 9cm wide!

This monster has some awesome details. The prominent ones are in the face. The wrinkles and wide open mouth, but there are also the muscles on his back and shoulders, the muscle fibers on the chest and the veins running under his skin!
This will keep you up at night!
Very cool facial features!

The model comes in three pieces, the body and two separate jaws that need to be glued into the mouth. The vents from pouring the resin can be easily removed by cutting them off and using some fine sanding stick to smooth them down. Be careful with the ears, however, they are fragile. Behind the ears, you will most likely find some flash and holes. this is because it's a multi part mold and the back of the head is where the pieces come together. I was a little disappointed at first, but it's not something a little putty and some precision sanding can't fix.

The problem behind the ears

The price of this bust is €59, which, in my opinion, is a bit high. Yes, it is a unique bust and you can see the time and dedication that has gone into designing it but for that price, I would have liked to see the mold problem behind the ears fixed. Luckily, Karol often has discounts on his models or combo deals, where you can buy multiple busts at a discount.

All and all I think that this is a really cool bust with great potential! It just needs to end up in the right hands. Karol himself is starting to paint one of these himself, so keep a close eye out on his Facebook for pictures.

That's it for this article. If I had to rate the bust I would give it an 8,5/10, with the only downsides the price and the holes behind the ears. Other than that, if you are a fan of vampires or monstrous busts, this is definitely something for you!

If you reached this point, thank you for reading through my ramblings, and I hope to see you next time!


Tuesday, July 25, 2017

Katsumoto - by Mitches Military Models

Hi everybody,

I want to apologize for my lack of recent posts but I've been busy with everything except painting. I did paint a few small project or made very little progress on current projects but nothing worth posting or writing about.

At the moment, my hobby seems more to be a collector of models and busts instead of being a painter.

My most recent purchase is a bust portraying Katsumoto from the movie The Last Samurai by Mitches Military Models. They have a large assortment of 120mm, 200mm resin figures, and busts. They range from historical models to modern day soldiers.

Some of the movie inspired pieces immediately caught my eye, and some of them were on sale as well! Lucky me!

The bust comes in 3 pieces. the head
and body, and 2 pieces that might be
ornamental or added armor
The bust is cast in light, yellowish resin. I believe this resin is toxic when inhaled so be sure to wear a dust mask when sanding or sawing! That being said, it is good practice to always wear a dust mask when sanding resin, to prevent Pneumoconiosis.

The model does require some cleanup, there is a pretty nasty mold line on the back of the model, running across the back and the back of his head. There are also some little blobs of resin between his collar and neck. The obvious flash should also be removed.


The blue-green dot is a part of the
silicon mold
Okay so it's obvious that this bust needs some serious cleaning up, but I'm still pretty excited about it! The bust is a perfect resemblance of the actor and character in the movie and it has some beautiful details! I'm definitely adding this one a little higher on the to do list for future projects!

A comparison between the bust and the original
So we have reached the end of this article. I will try to write more in the coming months. I have some interesting projects on the shelf so I hope I can find the time to start and finish them and write about it.

Thank you for reading and until next time!

Monday, December 14, 2015

Quickly paint engraved glyphs / OSL

Hello everybody!

Ever got a model that has those engraved glyphs that you would like to stand out more but all you have are dark washes? Ever tried to paint those glyphs and ended up in an eternal circle of going back and forth cleaning up mistakes?


Well that is what I had. I was painting 40 Necron warriors with converted weapons (engraved gun barrels instead of the green clear plastic ones) that I wanted to paint like the engraved detail was glowing. The easiest way to for me to do this would be to paint the glyphs white and airbrush some green glow over it.

Painting the white was a hassle and took way to much time to get it neatly done, so I set out to find a better way.

I found this by using the pin wash / panel wash technique, mostly used in historical scale modelling to darken the gaps between panels but this time, with a twist.

When you look online for panel lining you will find a bunch of video's and articles about black or brown oil washes. I used the mechanic behind this technique but I changed it by using white oil paint.

So what you need for this is:

  • White oil paint (titanium white)
  • (odorless) Thinner
  • (preferably) synthetic brush
What you want to do is first protect your paintjob with a layer of gloss or satin varnish! 
Next you will want to take a bit of the white paint and thin it down with the thinner. The thinner can really mess with your organic brushes. (they will ruin your red saber brushes)
Once the mix has a wash consistency it is time to take it to the model. 

Next step is SUPER easy! (as seen in the short video below)


After this step you can clean your brush in some thinner and dab the brush on a paper towel or cloth to get rid of the excess thinner and then use the damp brush to clean up around the edges.

Once the white wash is dry all that is left to do to create a simple OSL (object source lighting) is to airbrush some green over the gun barrel.

An other example of this technique is on the glyphs on the forceshield of an Eldar Wraithblade. 


As you can see it is super quick and easy. If you would like to make them glow you could airbrush some light blue (or any other color) over them to create a mystical effect.

Another application of this technique would be on for example, powerfists and plasma coils. Here it would be logical for the crevices to be the lightest. So you airbrush or paint your fist or plasma weapon in the desired color, use a white oil wash, and then glaze in some color. to make it blend in. 

I hope this article helped you to speed up or improve your painting. 

If it did please share your results!

Thank you for reading and leave no model unpainted!

Tuesday, December 8, 2015

Cheat edge highlights

Edge highlights... You either love them or hate them.

Personally, I love them on some parts of miniatures and hate them on other parts. But what I really hate about them, is having to paint edge highlights. It is one of the most fiddly, time consuming parts of painting a model. Your brush tip must be near perfect, your paint should be diluted to get a nice flow but not too thin and some area's are really, really hard to reach and not paint on other parts!

That is why, dear readers, in this article I will tell you how I cheat my edge highlights.

In historical scale model you see people using graphite pencils to create metallic welds and edges. This gave me an idea and I set out to my art store to buy artists watercolor pencils.


I used a pencil sharpener to get rid of the protective coating on the tip. Now, as you would with a brush, run the side of the tip over all your edges. Its really quick and easy! You can even erase errors using an eraser or a wet brush. You won't have to mind paint drying in the tip of your brush or paint drying on your palette.

** Make sure to varnish after applying the edge highlights. The watercolor pencil is not very durable!**

Some examples of my first trial run:


Overall I think this is about four times faster then using paint. I bought a bunch of different colors so I can have several stages of edge highlights.

The watercolor pencils could also be used to draw a sketch for if you want to freehand. You can blend out the pencil drawing with a wet brush or just paint over it.

I hope this quick article helped some of you.

If it did, feel free to share your experience in the comments!

As always, thank you for reading and hobby on!

Monday, September 21, 2015

Review: WAMP brushes

Hey everybody,

As some of you might know I made the decision to buy an airbrush early on in my 'painting career'.
The result of this is that I taught myself a bunch of cool masking and airbrush tricks, but I kind of neglected my brush skills.

Some of my more recent projects required me to do some more brush work. The kickstarter from WAMP launched around that time. This was a great opportunity to get myself some good brushes to 'brush up' my skills.

The kickstarter was a success! They got £42.843 while their goal was only £850. I got the starterset which includes the fine detail, detail, basecoat and freehand brushes. When I received the brushes this summer (2015) I decided to try them out and write a review.

The brushes are labeled with the task it was designed for. No more numbers like 00, 0, 1, 2 or 3 but clear names like fine detail, detail, basecoat and freehand. This doesn't mean you cannot paint details with your basecoat brush but it is more of an recommendation. This is supposed to make it easier for beginners and I think it really does!


The brushes are handcrafted by Rosemary & Co. This is a UK based company with a long track-record of making high quality artist brushes.

The handles of the brushes are thin and very light. The detail and freehand brushes have a nice and sharp tapered bristles where the basecoat brush is a little bit rounder, so it can hold more paint. The overall impression of the brushes is very positive!

This is how the brushes look after a few weeks of painting

I was happily surprised by these brushes. After months/years of trying to replace brush techniques with my airbrush my experience is that having the right tool does matter! Buying good brushes will not buy you skill but it does make it a lot easier and more enjoyable to learn new skills and try out those hard to master techniques.

The bristles have a nice 'flick' I think its called. That means that the bristles snap back into a point after you made your brushstroke on the model.

The only downside, for some reason they are not on their website. I don't know if the brushes have been released to the public yet or if they where kickstarter exclusive. I doubt this is the case though. There might be a delay before they release the the general public or they are currently sold out. If anyone knows please let me know in the comments!

** In the comments you can read the comment by Brett Johnson, stating that the brushes will be available soon but that they are waiting on some more stock before releasing them.**

So, that rounds up my review of this product. It is not my intention to push or promote this product in any way. I would like to explain my thoughts about this product and judge if it would be a safe investment or not. In my honest opinion: YES! I personally didn't have this much fun with 'analog painting' in a long, long time.

Thank you for reading and I hope to see you next time.

Tuesday, June 9, 2015

Product review: XTREME METAL paint by AK-Interactive

Hi guys and girls!

Today I would like to cover the XTREME METAL paints by AK-Interactive.

A word of caution before I start, these paints are enamel based and need to be applied with an airbrush. You really should wear a respirator or open a window to protect your lungs!

The paint can be applied without primer and is ''pretty durable'. If you plan for some serious weathering later on, I do recommend applying primer before applying the XTREME METAL paint. If you apply an enamel based paint over a acrylic or polyurethane primer it will withstand all sorts of abuse. I don't really know the science behind this, but its true. If you know why this is feel free to educate me in the comments.

Burnt Metal is very comparible to Tin Bitz, Tinny Tin or Scortched Metal

The tests I did where without primer. The paint seems quite durable as I lightly scratched and knocked the model over a couple of times without any damage to the paint.

The paint is self leveling and even if it pooled a little it will even out nicely. It has great coverage and gives a great result in just a few thin passes. It is fast drying, so after you're done cleaning your airbrush you can paint straight over it.

Brass compares the best with Brassy Brass or Tarnished Brass

That brings me to my next point. I didn't know what kind of paint it was. I expected it to be enamel so I cleaned my airbrush with odorless thinner. This worked eventually but still some of the paint dried inside my airbrush cup. After some soaking I cleared the nozzle of my airbrush. This incident did make me order the special cleaner that comes with the paint range. I suggest that if you buy these paints, you also order the cleaner just in case!

The paints can be polished. I used a rotary tool with a cotton buffing wheel. This might be a little aggressive for some surfaces. In that case I suggest using soft buffing pads.

Dark Aluminium is a great (Bolt)gun metal or (Shadowed)steel replacement 

The only paint that was a bit disappointing to me was the Jet Exhaust. It isn't a metallic paint, it is simply a transparent black. I do feel it is a good AK-Interactive product as with a few passes you can build up a nice gradient to achieve a nice blackened metal look. (the kind you really want on exhausts) I will also try to use this paint to paint some black miniatures. The transparent black might help blend the sometimes rough highlights back into the shadow.

Jet Exhaust is a transparent black. Very hard to compare to other colors

My conclusion is that this is a very good paint range if you need metallic base coats for your models. It withstands some wear & tear and takes washes and other paints very well. The result is very realistic and its easy to apply.

That's it for now! I hope you enjoyed reading this review and that it helps you decide if you would like to give these paints a try for yourself. I didn't try brush application with these paints because the manufacturer recommended against it. If you have any questions, recommendations of other comments please leave them below!

As always, thanks for reading and see you next time!

** I just got the XTREME METAL Cleaner and tried it out. The paint that has been stuck in my cup for a week and I got it clean under 5 seconds. Good job AK-Interactive! **

Thursday, May 21, 2015

How to make a 'dungeon' display base step-by-step

Hello there lovely people,

Sorry for my absence but I am still recovering from my broken radius so I haven't been building and painting much. Status on that is that the bone is healed but I still have to go to the physiotherapist every week because I still can't fully bend or extend my arm.

Okay enough of that. On to the subject you clicked on this link for.

For a project I'm working on I wanted a temple/dungeon kind of look. The model I'm working on is a Warhammer fantasy Khorne Skullreaper swinging a great sword of sorts. The original model is slightly tilting back while swinging his weapon, but when tilted forward it looks like he is leaping off something in full attack.

I quickly imagined the temple to be littered with skulls. Other then that it should look like cold, wet stone, the kind you would imagine in dungeons. I drew inspiration from a book I recently purchased for painting fantasy miniatures. It showed how to sculpt/build your own bases using milliput.

Lets begin!

The model comes on a 40x40mm base. It so happens that I had a 40x40x40mm plinth laying around from Sockelmacher. This pretty much is the perfect size!

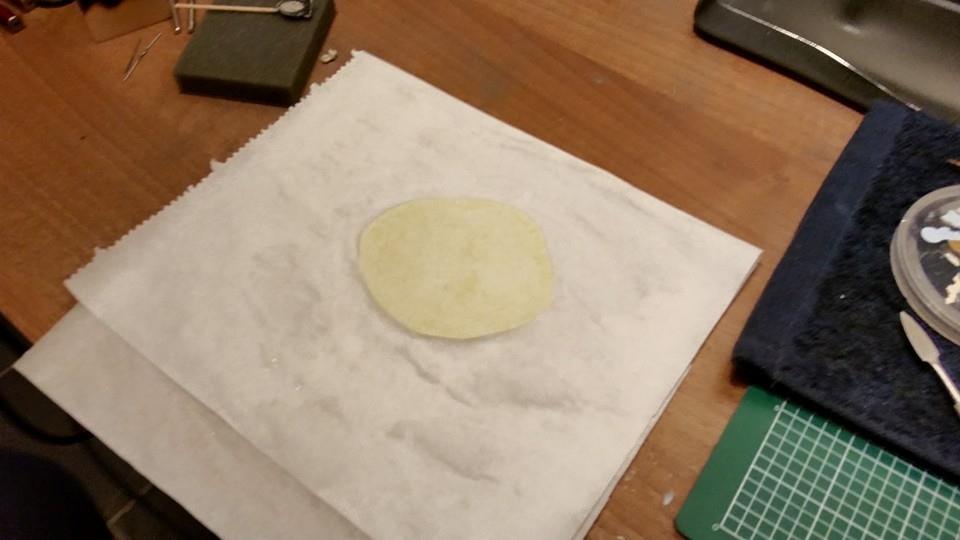
I began by mixing some milliput together. Once this was mixed well (no more streaks of different color in the ball of milliput) I rolled it out in greaseproof paper soaked in water to prevent it from sticking.


I then ended up putting something heavy on it, like a stack of books, and let it dry overnight. Once dried I drew out the shapes I wanted the steps to have. I used an old knife to score the surface of the milliput a couple of times and broke off the pieces.

(in case you where wondering, the columns are PK-pro ceramic scenery bits)

I then tried out some possible base compositions to try out what would look best. I wanted a look similar to what you see in some catacombs where there are skulls everywhere. I tried to use the skulls for staircases but that just didn't look right in this scale.

Concept #1 

Concept #2

So back to the simple granite steps! I tested what it would look like when instead of the skulls being used as part of the structure, they literately littered the place with skulls. This was much more pleasing to my eye but it still missed something.


I looked at some reference pictures online of dungeons, temples and catacombs. I finally found out what I was missing. Candles! Applying candles really helps changing it to a dark place, because if it isn't dark, why would you need candles, right? I looked up an tutorial on how to best make candles. I ended up with a tutorial by Massive Voodoo. Here Roman used BeesPutty to sculpt candles. I never really sculpted anything in my life since kindergarten.

My mother was sooooo happy with this portrait of her
(not)
Luckily I had a sample of BeesPutty laying around. (thank you Painting Buddha!) 
BeesPutty is a polymer sculpting clay. You don't need to mix it and to cure it you have to bake it, so it stays soft for you to put your project away overnight. It feels like wax or something and its really comfortable to work with.

Back lets go on with the candles!
Following the tutorial I rolled out a thin sausage (or different sizes of thin sausages) and cut them in different sizes. Cutting them the right way usually clusters them together but you can also put them together in whatever order you want.


I added a little bit of putty on a wooden block because that makes it less of a hassle to make the candles stick to the surface without glue. After baking you can simply cut it from its base and glue it in position.

Finger for scale


After placing them on a base used a cocktail pricker to make small holes to simulate the hole the flame would have made in the wax. 

When I had several bundles of candles I baked them in my kitchen oven for 20 minutes at 120°C (or 250°F) and let them cool when they are done. Once cooled I cut them from their base and glued them to my display base. I tried to place them on logical places. 

Filled the emptiness to make the steps,
and thus the base, more whole
When this was done it was time for primer. I primed the base using a zenithal highlighting technique. For primer I used the Vallejo polyurethane surface primer. I first sprayed the whole base black, then sprayed a grey color from directly above to create some nice shading. I then sprayed some details with white primer to make them stick out more. 


So once the primer was dry it was time for some paints! I used a same technique as use in THIS tutorial and wetted the base with water. I then continued by applying some drops of paint directly to the base. The colors I chose are cold grey, sandy brown, sand yellow and olive green. I then took a wet brush and blended the colors all over the base.


Once dry I applied some light dust colored dry pigments from AMMO to make the base look aged and dusty. I painted up the details like the skulls and candles (you should paint these however you want) and applied some washes to certain crevices to accentuate recesses and shadows.

The finished result! 
And there you have it! A (in my opinion) perfect temple/dungeon/catacomb display base! Keep in mind that for larger bases you should also think about adding chains, hinges, wooden struts, ropes and whatever as extra details. Because the model I'm gonna place on this base is pretty large compared to the base I didn't.

I hope you all liked my little step-by-step / tutorial and if you did make sure to let me know in the comments!

Thank you all for reading and see you next time!  


Wednesday, March 25, 2015

Product review: Vallejo Grey Pumice paste

Hi guys and girls,

Sorry for the lack of content lately but I have a valid excuse:

Small fracture in my left radius
Luckily for me no cast was required but it hurts and I am required to carry my arm in a sling. I am slowly getting my mobility back so typing is less hurtful and I can rest my arm on a desk now.

Okay, on with the subject of this article.

Vallejo basing pastes. Not a lot of people use these but I found that they are a great addition to a modelers arsenal. I have two variants, the Dark Earth #26.218 and the Grey Pumice #26.213. If you buy a pot you will get a 200ml. pot filled with a sandy or stony paste consisting pigments, resin and a texture like sand or an other material.

200ml. pot of basing paste
Depending on what you use it for this pot can last you a good while! I can imagine that if you are using this to base an army of gaming models that one pot will last you through the entire army.

Beneath the lid
Applying it can be done with either an old brush or a painting knife/sculpting tool. What I really like about this product is that you can really sculpt texture onto your base. Be sure to keep your good brushes away from this stuff as it will ruin them beyond repair! I personally use some very cheap, slightly bigger brushes with very stiff bristles. They are also sometimes used to apply woodglue to surfaces. They can scoop up a good amount of paste and its pretty easy using it to apply it to a base. You can really build up and sculpt your texture to a base.

A brush full of basing paste.
Be sure to cover the entire area you want to be covered with this texture. There is a little bit of shrinkage so you will have to keep that in mind. You can build it up quite thick but that will have a direct result in longer drying times, which are between 45 minutes to even days.

Dried basing paste
This is the result after about 10 hours of drying time. It is dry to touch and you can continue by painting it. While it will remain a little soft for a day or two it is dry enough to hold paint, receive a drybrush and being exposed to washes and pigments.

I really hope you guys liked this article and that it helps you improve your bases. If you have any questions or remarks please leave them in the comments!

Happy modeling and painting my friends!


Monday, February 16, 2015

Small animals on bases and models

Hello there highly regarded friends, readers and followers! (even the haters get some love from me!)

Today I would very much like to share a product with you that I recently purchased. It is the Small Animals set made by Busch Modelbau. (special link for dutch readers) It is a German product and according to them the animals are in scale 1:87. At this scale a 6 foot or 1.80 meter human at this scale would be 20mm. This makes them small-ish for hero scale miniatures which are commonly between 28-32mm. 

They work fine however. For me they are meant to set a scene on the base or give people some little extra details to look at while looking at my models. 

The set contains 8 butterflies, frogs, rats, snakes bugs and fishes, 4 salamanders and squirrels and 2 rabbits hedgehogs, crows, woodpeckers and owls. That's well over 50 animals! 

Okay time for some pictures! 

The small animals set comes with 6 sprue's
This sprue contains the rats, snakes, bugs, fish and frogs
This spue contains the birds, hedgehog and rabbits
 So that is everything you get for a RRP of about €8 - $10 - £6. I would personally say that is good value. Painting these little critters can be hard so the manufacturer suggests painting them on sprue. In most cases I recommend you follow these instructions because some of these animals (like the frogs and salamanders) are really, really small! 

After painting you simply glue your animal where you want it. Wanna see what that looks like? Here are some pictures!

Owl sitting on a tree branch
Little green critter performing an excellent wall walk
Little mouse/rat just minding his business

Okay so that is it for now. I find this set to be very useful as it can be used for a wide variety in model and base building.

I hope you guys liked this little article and if you did (or didn't) feel free to write a comment in the section below. If you have seen other products you would like me to cover you can also let me know through the comments.

Thank you all for reading and enjoy your hobby!