Hello, konnichiwa, aloha, buongiorno hobby and painting friends!
In this article, I will show how I made a quick and simple cobstone base. This could be for a scene in a house, a dungeon or just as a stone wall in a field.
I wanted to make a base for a 3D printed barbarian mini I once got. (I'm sorry I forgot where I got it) And I figured him raiding a house or exploring a dungeon. (the mini has a very high Elder Scrolls feel for me) So I had to make him a base that sets the scene for that! I was looking at some pictures and decided on what I thought looked best.
I started with a piece of roughly sawed / half splintered wood. This was done intentionally but didn't turn out the way I wanted. However, it was perfect to serve as a base for this!
I started by drawing out how I wanted my base to look, (yes I was actually planning ahead) by tracing the outline of the base on some paper. This gave me a base where I could make sketches on and help me sculpt (or in other cases maybe build) the base on.
I started by sculpting the wall out of Milliput balls, tacked together, made to look like stones and I textured them using a rigid brush, an old toothbrush, and a sponge. You can pretty much use whatever you like and what you have lying around.
Once I was happy with the result, I let the Milliput dry a little so it won't be too vulnerable when I started sculpting. It doesn't have to set rock hard, just firm enough so it won't scratch or dent easily. I then continued with the floor tiles. To make the Milliput adhere to the wood better, I scored the base with Dremel. This way the Milliput has something to grip onto so it won't let go once the Milliput dries. Using the same tools I used making the wall, I sculpted and textured the floor tiles.
Once the floor is done, it was time to create some morter between the rocks. This was done by rubbing in some watered down gypsum over the stones and tiles. I also used this to dull down some of the texture on the rocks.
I have also added some balsa wood square sticks to the base to look like struts and placed them in "logical" places, or where I thought it would look good. You can also use this to add some more dimensions to your base, as you can use it to create depth or the illusion of a larger structure. By this time, the gypsum has dried and set between the stones to look like cement.
To make the base more interesting I also added a vase. I created this by hot-gluing a gypsum brick to my rotary tool and spinning it while using sandpaper and files to manipulate the gypsum. (mini for scale)
Finally, I added some plasticard to the sides of the base and to the back, to give the whole thing a smooth finish. I cut all the pieces to size and glued them to the wood. I then proceeded to cut and sand the plasticard to fit the profile of the wall.
That's it for this step-by-step! I hope you guys enjoyed it and find it useful to see what I did to create this.
How do you make your bases? Do you go all out with putty, or do you just want to create a simple setting on a plinth or gaming base? Let me know in the comments!
Showing posts with label display base. Show all posts
Monday, July 23, 2018
Tuesday, September 5, 2017
Showcase: Primaris Space Marine
Hello fellow painters and paintresses, 😜
In this showcase, I would like to share a recently finished project, as promised. Before I got the Gabriel Angelos model I showed last week, I went to my local Warhammer store and got a Primaris Marine on sprue to paint.
I didn't choose a specific chapter but I went with a color scheme that would look nice and eye-catching. The base was made on a 35mm round plinth and was made to look like a muddy wasteland.
The puddle of water on the base was made using Secret Weapon Miniatures Realistic Water with a little bit of green paint. This was actually the first time I used this product and while it does shrink a lot, it doesn't smell bad.
Below you will find some more WIP (work in progress) pictures of this project.
I hope you enjoyed this little showcase article. If you have any questions feel free to post them in the comments and I will answer them as best as I can.
If you want to see some of my WIP pictures, feel free to follow me on Instagram!
That's it for today! I hope I will see you guys and girls in a next article!
In this showcase, I would like to share a recently finished project, as promised. Before I got the Gabriel Angelos model I showed last week, I went to my local Warhammer store and got a Primaris Marine on sprue to paint.
I didn't choose a specific chapter but I went with a color scheme that would look nice and eye-catching. The base was made on a 35mm round plinth and was made to look like a muddy wasteland.
The puddle of water on the base was made using Secret Weapon Miniatures Realistic Water with a little bit of green paint. This was actually the first time I used this product and while it does shrink a lot, it doesn't smell bad.
Below you will find some more WIP (work in progress) pictures of this project.
![]() |
| The model on sprue |
![]() |
| I mixed the brightest orange I could create |
![]() |
| Some subtle shades of warm grey to create depth The eyes were created with glazes of Vallejo Fluo blue |
![]() |
| Highlights airbrushed on using a light skin tone |
![]() |
| Some handpainted battle damage |
![]() |
| Building up the basic shape for the base with cork and tubing |
![]() |
| Filling gaps with Milliput |
![]() |
| Sanded the Milliput to create a smoot surface |
![]() |
| I added Vallejo Fresh Mud texture paste |
![]() |
| Some barbed wire from ArmyPainter, rolled around a pencil |
If you want to see some of my WIP pictures, feel free to follow me on Instagram!
That's it for today! I hope I will see you guys and girls in a next article!
Friday, September 1, 2017
Showcase: Gabriel Angelos
Hello fellow painters and modelers,
In light on my recent article on finishing projects for the sake of finishing them and learning from them, I hereby present my first finished project since that post.
This is Gabriel Angelos, chapter master of the Blood Ravens Space Marine chapter, known from the Dawn of War Warhammer 40K video games.
The model was supplied by "W" Miniatures Artel. The model is painted with airbrush and brushes and the base is scratch-built with plastic card and tubes on a wooden plinth by Sockelmacher.
Below you will find pictures of the finished project as well as some WIP pictures. If you have any questions feel free to post them in the comments.
I really enjoyed painting this model. Dawn of War, especially DoW2 is one of my favorite games and while you can't play as Gabriel Angelos, he is still a great character in the game.
I hope you enjoyed the pictures and I will see you next time!
Monday, November 28, 2016
How to turn a picture frame into a display plinth
Hello and welcome if you are new and welcome back if you are a regular reader! 😊
Today I will show you how to create a very simple and very cheap display plinth for scale model tanks (Example 1), airplanes ships or dioramas. You could even turn it into a squad display (Example 2) if you are into wargamers.
The very long list of requirements for this is:
A dollar store beveled picture frame.
That's it.
A dollar store beveled picture frame.
That's it.
![]() |
| 10*15cm beveled picture frame |
For this specific display, I picked a 10cm x 15cm frame, but you can pick whatever fits your project.
So first remove the back of the frame and the glass that is supposed to cover your picture.
![]() |
| removing the back of the frame |
Get rid of the stand and any other bits they might have added to hang it on your wall or anything.
Place the back of the picture frame in front of the frame like shown in the picture.
![]() |
| I used a sturdy sculpting tool to remove the metal bits |
Now place your model(s) on it and start planning how to build your base. Thus could be an ocean, beach, landings trip, a simple road or a more elaborate scene. Whatever you want. If you want, you can paint the whole thing in a uniform color to get a better idea of how it will eventually look.
![]() |
| Final result! |
![]() |
| Example 1 |
![]() |
| Example 2 |
I hope you found this article helpful! What do you use for plinths? Please share any tips or questions you might have in the comments!
Good luck and happy painting!
Thursday, May 21, 2015
How to make a 'dungeon' display base step-by-step
Hello there lovely people,
Sorry for my absence but I am still recovering from my broken radius so I haven't been building and painting much. Status on that is that the bone is healed but I still have to go to the physiotherapist every week because I still can't fully bend or extend my arm.
Okay enough of that. On to the subject you clicked on this link for.
For a project I'm working on I wanted a temple/dungeon kind of look. The model I'm working on is a Warhammer fantasy Khorne Skullreaper swinging a great sword of sorts. The original model is slightly tilting back while swinging his weapon, but when tilted forward it looks like he is leaping off something in full attack.
I quickly imagined the temple to be littered with skulls. Other then that it should look like cold, wet stone, the kind you would imagine in dungeons. I drew inspiration from a book I recently purchased for painting fantasy miniatures. It showed how to sculpt/build your own bases using milliput.
Lets begin!
The model comes on a 40x40mm base. It so happens that I had a 40x40x40mm plinth laying around from Sockelmacher. This pretty much is the perfect size!
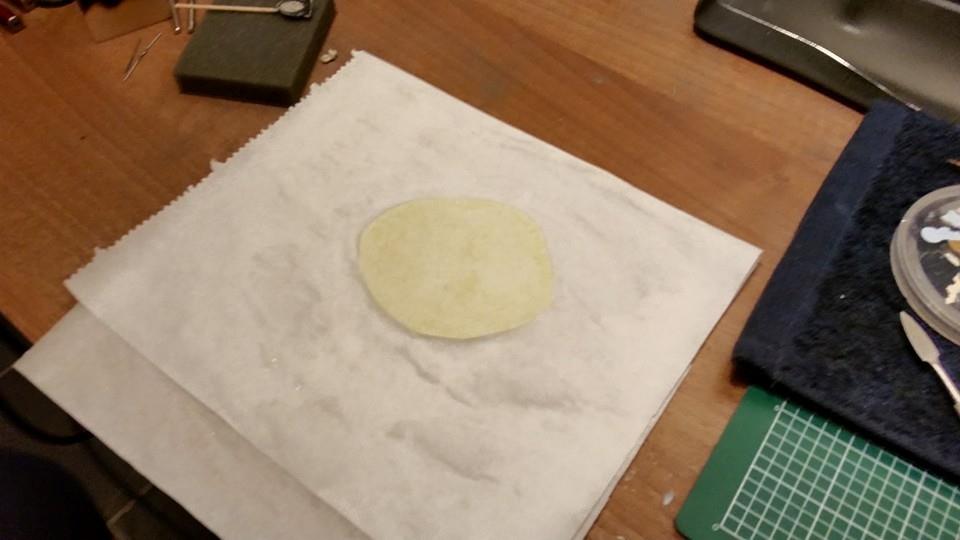
I began by mixing some milliput together. Once this was mixed well (no more streaks of different color in the ball of milliput) I rolled it out in greaseproof paper soaked in water to prevent it from sticking.
I then ended up putting something heavy on it, like a stack of books, and let it dry overnight. Once dried I drew out the shapes I wanted the steps to have. I used an old knife to score the surface of the milliput a couple of times and broke off the pieces.
(in case you where wondering, the columns are PK-pro ceramic scenery bits)
I then tried out some possible base compositions to try out what would look best. I wanted a look similar to what you see in some catacombs where there are skulls everywhere. I tried to use the skulls for staircases but that just didn't look right in this scale.
So back to the simple granite steps! I tested what it would look like when instead of the skulls being used as part of the structure, they literately littered the place with skulls. This was much more pleasing to my eye but it still missed something.
Once dry I applied some light dust colored dry pigments from AMMO to make the base look aged and dusty. I painted up the details like the skulls and candles (you should paint these however you want) and applied some washes to certain crevices to accentuate recesses and shadows.
I hope you all liked my little step-by-step / tutorial and if you did make sure to let me know in the comments!
Sorry for my absence but I am still recovering from my broken radius so I haven't been building and painting much. Status on that is that the bone is healed but I still have to go to the physiotherapist every week because I still can't fully bend or extend my arm.
Okay enough of that. On to the subject you clicked on this link for.
For a project I'm working on I wanted a temple/dungeon kind of look. The model I'm working on is a Warhammer fantasy Khorne Skullreaper swinging a great sword of sorts. The original model is slightly tilting back while swinging his weapon, but when tilted forward it looks like he is leaping off something in full attack.
I quickly imagined the temple to be littered with skulls. Other then that it should look like cold, wet stone, the kind you would imagine in dungeons. I drew inspiration from a book I recently purchased for painting fantasy miniatures. It showed how to sculpt/build your own bases using milliput.
Lets begin!
The model comes on a 40x40mm base. It so happens that I had a 40x40x40mm plinth laying around from Sockelmacher. This pretty much is the perfect size!
I began by mixing some milliput together. Once this was mixed well (no more streaks of different color in the ball of milliput) I rolled it out in greaseproof paper soaked in water to prevent it from sticking.
(in case you where wondering, the columns are PK-pro ceramic scenery bits)
I then tried out some possible base compositions to try out what would look best. I wanted a look similar to what you see in some catacombs where there are skulls everywhere. I tried to use the skulls for staircases but that just didn't look right in this scale.
![]() |
| Concept #1 |
![]() |
| Concept #2 |
So back to the simple granite steps! I tested what it would look like when instead of the skulls being used as part of the structure, they literately littered the place with skulls. This was much more pleasing to my eye but it still missed something.
I looked at some reference pictures online of dungeons, temples and catacombs. I finally found out what I was missing. Candles! Applying candles really helps changing it to a dark place, because if it isn't dark, why would you need candles, right? I looked up an tutorial on how to best make candles. I ended up with a tutorial by Massive Voodoo. Here Roman used BeesPutty to sculpt candles. I never really sculpted anything in my life since kindergarten.
![]() |
| My mother was sooooo happy with this portrait of her (not) |
Luckily I had a sample of BeesPutty laying around. (thank you Painting Buddha!)
BeesPutty is a polymer sculpting clay. You don't need to mix it and to cure it you have to bake it, so it stays soft for you to put your project away overnight. It feels like wax or something and its really comfortable to work with.
Back lets go on with the candles!
Following the tutorial I rolled out a thin sausage (or different sizes of thin sausages) and cut them in different sizes. Cutting them the right way usually clusters them together but you can also put them together in whatever order you want.
I added a little bit of putty on a wooden block because that makes it less of a hassle to make the candles stick to the surface without glue. After baking you can simply cut it from its base and glue it in position.
![]() |
| Finger for scale |
After placing them on a base used a cocktail pricker to make small holes to simulate the hole the flame would have made in the wax.
When I had several bundles of candles I baked them in my kitchen oven for 20 minutes at 120°C (or 250°F) and let them cool when they are done. Once cooled I cut them from their base and glued them to my display base. I tried to place them on logical places.
![]() |
| Filled the emptiness to make the steps, and thus the base, more whole |
When this was done it was time for primer. I primed the base using a zenithal highlighting technique. For primer I used the Vallejo polyurethane surface primer. I first sprayed the whole base black, then sprayed a grey color from directly above to create some nice shading. I then sprayed some details with white primer to make them stick out more.
So once the primer was dry it was time for some paints! I used a same technique as use in THIS tutorial and wetted the base with water. I then continued by applying some drops of paint directly to the base. The colors I chose are cold grey, sandy brown, sand yellow and olive green. I then took a wet brush and blended the colors all over the base.
Once dry I applied some light dust colored dry pigments from AMMO to make the base look aged and dusty. I painted up the details like the skulls and candles (you should paint these however you want) and applied some washes to certain crevices to accentuate recesses and shadows.
![]() |
| The finished result! |
And there you have it! A (in my opinion) perfect temple/dungeon/catacomb display base! Keep in mind that for larger bases you should also think about adding chains, hinges, wooden struts, ropes and whatever as extra details. Because the model I'm gonna place on this base is pretty large compared to the base I didn't.
Thank you all for reading and see you next time!
Monday, February 16, 2015
Small animals on bases and models
Hello there highly regarded friends, readers and followers! (even the haters get some love from me!)
Today I would very much like to share a product with you that I recently purchased. It is the Small Animals set made by Busch Modelbau. (special link for dutch readers) It is a German product and according to them the animals are in scale 1:87. At this scale a 6 foot or 1.80 meter human at this scale would be 20mm. This makes them small-ish for hero scale miniatures which are commonly between 28-32mm.
They work fine however. For me they are meant to set a scene on the base or give people some little extra details to look at while looking at my models.
The set contains 8 butterflies, frogs, rats, snakes bugs and fishes, 4 salamanders and squirrels and 2 rabbits hedgehogs, crows, woodpeckers and owls. That's well over 50 animals!
Okay time for some pictures!
![]() |
| The small animals set comes with 6 sprue's |
![]() |
| This sprue contains the rats, snakes, bugs, fish and frogs |
![]() |
| This spue contains the birds, hedgehog and rabbits |
So that is everything you get for a RRP of about €8 - $10 - £6. I would personally say that is good value. Painting these little critters can be hard so the manufacturer suggests painting them on sprue. In most cases I recommend you follow these instructions because some of these animals (like the frogs and salamanders) are really, really small!
After painting you simply glue your animal where you want it. Wanna see what that looks like? Here are some pictures!
![]() |
| Owl sitting on a tree branch |
![]() |
| Little green critter performing an excellent wall walk |
![]() |
| Little mouse/rat just minding his business |
Okay so that is it for now. I find this set to be very useful as it can be used for a wide variety in model and base building.
I hope you guys liked this little article and if you did (or didn't) feel free to write a comment in the section below. If you have seen other products you would like me to cover you can also let me know through the comments.
Thank you all for reading and enjoy your hobby!
I hope you guys liked this little article and if you did (or didn't) feel free to write a comment in the section below. If you have seen other products you would like me to cover you can also let me know through the comments.
Thank you all for reading and enjoy your hobby!
Subscribe to:
Posts (Atom)